As you’ll see, this list of easy recorder songs includes quite a lot of Christmas songs you can easily play with a recorder.
Below the list you’ll find detailed instructions to play each of the first 10 songs on a recorder.
You can use the table of contents to jump to the section you’re looking for.
- “Hot Cross Buns” – This is a traditional English nursery rhyme that is often used as a warm-up exercise for beginning recorder players. It has a simple melody and only uses the notes B, A, and G.
- “Twinkle, Twinkle, Little Star” – This is another popular nursery rhyme that is easy to play on the recorder. It uses the notes B, A, G, F, E, and D.
- “Mary Had a Little Lamb” – This is another simple song that is easy to play on the recorder. It uses the notes A, G, and E.
- “Row, Row, Row Your Boat” – This is a traditional children’s song that uses the notes G, A, and B.
- “London Bridge is Falling Down” – This is another traditional children’s song that is easy to play on the recorder. It uses the notes A, G, F, and E.
- “Old McDonald Had a Farm” – This is a popular children’s song that uses the notes A, G, F, and E.
- “Hickory Dickory Dock” – This is a traditional nursery rhyme that is easy to play on the recorder. It uses the notes A, G, F, and E.
- “The Alphabet Song” – This is a simple song that uses the notes A, B, C, D, E, F, and G.
- “Baa, Baa, Black Sheep” – This is a traditional nursery rhyme that is easy to play on the recorder. It uses the notes A, G, and E.
- “Yankee Doodle” – This is a popular American folk song that is easy to play on the recorder. It uses the notes A, G, F, and E.
- “Clementine” – This is a popular American folk song that is easy to play on the recorder. It uses the notes C, D, E, F, G, and A.
- “The Itsy Bitsy Spider” – This is a popular children’s song that is easy to play on the recorder. It uses the notes C, D, E, F, and G.
- “Hokey Pokey” – This is a popular children’s song that is easy to play on the recorder. It uses the notes C, D, E, F, and G.
- “The Farmer in the Dell” – This is a traditional children’s song that is easy to play on the recorder. It uses the notes C, D, E, F, and G.
- “She’ll Be Comin’ Round the Mountain” – This is a popular American folk song that is easy to play on the recorder. It uses the notes C, D, E, F, and G.
- “I’m a Little Teapot” – This is a popular children’s song that is easy to play on the recorder. It uses the notes C, D, E, F, and G.
- “I’ve Been Working on the Railroad” – This is a popular American folk song that is easy to play on the recorder. It uses the notes C, D, E, F, and G.
- “The Wheels on the Bus” – This is a popular children’s song that is easy to play on the recorder. It uses the notes C, D, E, F, and G.
- “If You’re Happy and You Know It” – This is a popular children’s song that is easy to play on the recorder. It uses the notes C, D, E, F, and G.
- “This Old Man” – This is a traditional children’s song that is easy to play on the recorder. It uses the notes C, D, E, F, and G.
- “Pop Goes the Weasel” – This is a traditional children’s song that is easy to play on the recorder. It uses the notes C, D, E, F, and G.
- “The Muffin Man” – This is a traditional children’s song that is easy to play on the recorder. It uses the notes C, D, E, F, and G.
- “Jingle Bells” – This is a popular holiday song that is easy to play on the recorder. It uses the notes C, D, E, F, G, and A.
- “We Wish You a Merry Christmas” – This is another popular holiday song that is easy to play on the recorder. It uses the notes C, D, E, F, and G.
- “Deck the Halls” – This is a popular holiday song that is easy to play on the recorder. It uses the notes C, D, E, F, and G.
- “Away in a Manger” – This is a traditional holiday song that is easy to play on the recorder. It uses the notes C, D, E, F, and G.
- “Joy to the World” – This is a popular holiday song that is easy to play on the recorder. It uses the notes C, D, E, F, and G.
- “Hark! The Herald Angels Sing” – This is a traditional holiday song that is easy to play on the recorder. It uses the notes C, D, E, F, and G.
- “O Come, All Ye Faithful” – This is a traditional holiday song that is easy to play on the recorder. It uses the notes C, D, E, F, and G.
- “O Holy Night” – This is a traditional holiday song that is easy to play on the recorder. It uses the notes C, D, E, F, and G.
- “Silent Night” – This is a popular holiday song that is easy to play on the recorder. It uses the notes C, D, E, F, and G.
- “Jingle Bell Rock” – This is a popular holiday song that is easy to play on the recorder. It uses the notes C, D, E, F, G, and A.
- “Rudolph the Red-Nosed Reindeer” – This is a popular holiday song that is easy to play on the recorder. It uses the notes C, D, E, F, and G.
- “Santa Claus is Coming to Town” – This is a popular holiday song that is easy to play on the recorder. It uses the notes C, D, E, F, and G.
- “Frosty the Snowman” – This is a popular holiday song that is easy to play on the recorder. It uses the notes C, D, E, F, and G.
- “Winter Wonderland” – This is a popular holiday song that is easy to play on the recorder.
- “Let it Snow! Let it Snow! Let it Snow!” – This is a popular holiday song that is easy to play on the recorder. It uses the notes C, D, E, F, and G.
- “Rockin’ Around the Christmas Tree” – This is a popular holiday song that is easy to play on the recorder. It uses the notes C, D, E, F, and G.
- “Jingle Bells (Rock Version)” – This is a popular holiday song that is easy to play on the recorder. It uses the notes C, D, E, F, G, and A.
- “The Twelve Days of Christmas” – This is a traditional holiday song that is easy to play on the recorder. It uses the notes C, D, E, F, and G.
- “We Wish You a Merry Christmas (Rock Version)” – This is a popular holiday song that is easy to play on the recorder. It uses the notes C, D, E, F, and G.
- “Deck the Halls (Rock Version)” – This is a popular holiday song that is easy to play on the recorder. It uses the notes C, D, E, F, and G.
- “Jingle Bell Rock (Rock Version)” – This is a popular holiday song that is easy to play on the recorder. It uses the notes C, D, E, F, G, and A.
- “Santa Claus is Coming to Town (Rock Version)” – This is a popular holiday song that is easy to play on the recorder. It uses the notes C, D, E, F, and G.
- “Rudolph the Red-Nosed Reindeer (Rock Version)” – This is a popular holiday song that is easy to play on the recorder. It uses the notes C, D, E, F, and G.
- “Frosty the Snowman (Rock Version)” – This is a popular holiday song that is easy to play on the recorder. It uses the notes C, D, E, F, and G.
- “Winter Wonderland (Rock Version)” – This is a popular holiday song that is easy to play on the recorder. It uses the notes C, D, E, F, and G.
- “Let it Snow! Let it Snow! Let it Snow! (Rock Version)” – This is a popular holiday song that is easy to play on the recorder. It uses the notes C, D, E, F, and G.
- “Rockin’ Around the Christmas Tree (Rock Version)” – This is a popular holiday song that is easy to play on the recorder. It uses the notes C, D, E, F, and G.
Hot Cross Buns
| B | A | G |
|---|---|---|
| B | B | B |
| B | B | B |
| B | B | B |
| A | A | A |
| B | B | B |
In this sheet, the notes are represented by the letters B, A, and G, which correspond to the notes played on the recorder. The vertical lines represent measures, and the number of notes in each measure is determined by the time signature. In this case, the time signature is 3/4, which means that there are three beats in each measure and that the quarter note gets one beat.
To play this song on the recorder, start by blowing into the mouthpiece and covering the holes with your fingers to play the notes B, A, and G. You can also use your thumb to cover the hole on the back of the recorder to create different pitches.
Remember to start slowly and gradually increase the tempo as you become more comfortable with the song. Practice makes perfect, so keep at it and you will soon be able to play this song on the recorder with ease.
Twinkle, Twinkle, Little Star
| B | A | G | F | E | D |
|---|---|---|---|---|---|
| D | D | D | E | D | G |
| G | G | G | F | E | D |
| B | B | B | A | G | F |
| D | D | D | E | D | G |
| G | G | G | G | A | G |
In this sheet, the notes are represented by the letters B, A, G, F, E, and D, which correspond to the notes played on the recorder. The vertical lines represent measures, and the number of notes in each measure is determined by the time signature. In this case, the time signature is 3/4, which means that there are three beats in each measure and that the quarter note gets one beat.
To play this song on the recorder, start by blowing into the mouthpiece and covering the holes with your fingers to play the notes B, A, G, F, E, and D. You can also use your thumb to cover the hole on the back of the recorder to create different pitches.
Remember to start slowly and gradually increase the tempo as you become more comfortable with the song. Practice makes perfect, so keep at it and you will soon be able to play this song on the recorder with ease.
Mary Had a Little Lamb
| A | G | E |
|---|---|---|
| A | A | A |
| A | A | A |
| A | A | A |
| E | E | E |
| A | A | A |
In this sheet, the notes are represented by the letters A, G, and E, which correspond to the notes played on the recorder. The vertical lines represent measures, and the number of notes in each measure is determined by the time signature. In this case, the time signature is 3/4, which means that there are three beats in each measure and that the quarter note gets one beat.
To play this song on the recorder, start by blowing into the mouthpiece and covering the holes with your fingers to play the notes A, G, and E. You can also use your thumb to cover the hole on the back of the recorder to create different pitches.
Remember to start slowly and gradually increase the tempo as you become more comfortable with the song. Practice makes perfect, so keep at it and you will soon be able to play this song on the recorder with ease.
Row, Row, Row Your Boat
- Start by blowing into the recorder and making a nice, clear sound.
- To play the first two notes, put your index finger on the top hole of the recorder and your thumb on the bottom hole. This is called a “first finger” position.
- Play the notes “G” and “A” by blowing into the recorder and keeping your fingers in the first finger position.
- To play the next two notes, move your index finger down to the second hole from the top, while keeping your thumb on the bottom hole. This is called a “second finger” position.
- Play the notes “B” and “C” by blowing into the recorder and keeping your fingers in the second finger position.
- To play the next two notes, move your index finger down to the third hole from the top, while keeping your thumb on the bottom hole. This is called a “third finger” position.
- Play the notes “D” and “E” by blowing into the recorder and keeping your fingers in the third finger position.
- To play the final two notes, move your index finger down to the fourth hole from the top, while keeping your thumb on the bottom hole. This is called a “fourth finger” position.
- Play the notes “F” and “G” by blowing into the recorder and keeping your fingers in the fourth finger position.
Here’s the melody written out with the fingerings indicated:
G (first finger) A (first finger) B (second finger) C (second finger) D (third finger) E (third finger) F (fourth finger) G (fourth finger)
London Bridge is Falling Down
- Start by blowing into the recorder and making a nice, clear sound.
- To play the first two notes, put your index finger on the top hole of the recorder and your thumb on the bottom hole. This is called a “first finger” position.
- Play the notes “D” and “G” by blowing into the recorder and keeping your fingers in the first finger position.
- To play the next two notes, move your index finger down to the second hole from the top, while keeping your thumb on the bottom hole. This is called a “second finger” position.
- Play the notes “B” and “D” by blowing into the recorder and keeping your fingers in the second finger position.
- To play the next two notes, move your index finger down to the third hole from the top, while keeping your thumb on the bottom hole. This is called a “third finger” position.
- Play the notes “G” and “A” by blowing into the recorder and keeping your fingers in the third finger position.
- To play the final two notes, move your index finger down to the fourth hole from the top, while keeping your thumb on the bottom hole. This is called a “fourth finger” position.
- Play the notes “D” and “G” by blowing into the recorder and keeping your fingers in the fourth finger position.
Here’s the melody written out with the fingerings indicated:
D (first finger) G (first finger) B (second finger) D (second finger) G (third finger) A (third finger) D (fourth finger) G (fourth finger)
Old McDonald Had A Farm
- Start by blowing into the recorder and making a nice, clear sound.
- To play the first two notes, put your index finger on the top hole of the recorder and your thumb on the bottom hole. This is called a “first finger” position.
- Play the notes “E” and “G” by blowing into the recorder and keeping your fingers in the first finger position.
- To play the next two notes, move your index finger down to the second hole from the top, while keeping your thumb on the bottom hole. This is called a “second finger” position.
- Play the notes “E” and “G” by blowing into the recorder and keeping your fingers in the second finger position.
- To play the next two notes, move your index finger down to the third hole from the top, while keeping your thumb on the bottom hole. This is called a “third finger” position.
- Play the notes “E” and “C” by blowing into the recorder and keeping your fingers in the third finger position.
- To play the final two notes, move your index finger down to the fourth hole from the top, while keeping your thumb on the bottom hole. This is called a “fourth finger” position.
- Play the notes “D” and “E” by blowing into the recorder and keeping your fingers in the fourth finger position.
Here’s the melody written out with the fingerings indicated:
E (first finger) G (first finger) E (second finger) G (second finger) E (third finger) C (third finger) D (fourth finger) E (fourth finger)
Hickory Dickory Dock
- Start by blowing into the recorder and making a nice, clear sound.
- To play the first two notes, put your index finger on the top hole of the recorder and your thumb on the bottom hole. This is called a “first finger” position.
- Play the notes “C” and “D” by blowing into the recorder and keeping your fingers in the first finger position.
- To play the next two notes, move your index finger down to the second hole from the top, while keeping your thumb on the bottom hole. This is called a “second finger” position.
- Play the notes “E” and “F” by blowing into the recorder and keeping your fingers in the second finger position.
- To play the next two notes, move your index finger down to the third hole from the top, while keeping your thumb on the bottom hole. This is called a “third finger” position.
- Play the notes “G” and “A” by blowing into the recorder and keeping your fingers in the third finger position.
- To play the final two notes, move your index finger down to the fourth hole from the top, while keeping your thumb on the bottom hole. This is called a “fourth finger” position.
- Play the notes “B” and “C” by blowing into the recorder and keeping your fingers in the fourth finger position.
Here’s the melody written out with the fingerings indicated:
C (first finger) D (first finger) E (second finger) F (second finger) G (third finger) A (third finger) B (fourth finger) C (fourth finger)
The Alphabet Song
- Start by blowing into the recorder and making a nice, clear sound.
- To play the first two notes, put your index finger on the top hole of the recorder and your thumb on the bottom hole. This is called a “first finger” position.
- Play the notes “A” and “B” by blowing into the recorder and keeping your fingers in the first finger position.
- To play the next two notes, move your index finger down to the second hole from the top, while keeping your thumb on the bottom hole. This is called a “second finger” position.
- Play the notes “C” and “D” by blowing into the recorder and keeping your fingers in the second finger position.
- To play the next two notes, move your index finger down to the third hole from the top, while keeping your thumb on the bottom hole. This is called a “third finger” position.
- Play the notes “E” and “F” by blowing into the recorder and keeping your fingers in the third finger position.
- To play the final two notes, move your index finger down to the fourth hole from the top, while keeping your thumb on the bottom hole. This is called a “fourth finger” position.
- Play the notes “G” and “A” by blowing into the recorder and keeping your fingers in the fourth finger position.
Here’s the melody written out with the fingerings indicated:
A (first finger) B (first finger) C (second finger) D (second finger) E (third finger) F (third finger) G (fourth finger) A (fourth finger)
Baa, Baa, Black Sheep
- Start by blowing into the recorder and making a nice, clear sound.
- To play the first two notes, put your index finger on the top hole of the recorder and your thumb on the bottom hole. This is called a “first finger” position.
- Play the notes “G” and “A” by blowing into the recorder and keeping your fingers in the first finger position.
- To play the next two notes, move your index finger down to the second hole from the top, while keeping your thumb on the bottom hole. This is called a “second finger” position.
- Play the notes “G” and “F” by blowing into the recorder and keeping your fingers in the second finger position.
- To play the next two notes, move your index finger down to the third hole from the top, while keeping your thumb on the bottom hole. This is called a “third finger” position.
- Play the notes “E” and “D” by blowing into the recorder and keeping your fingers in the third finger position.
- To play the final two notes, move your index finger down to the fourth hole from the top, while keeping your thumb on the bottom hole. This is called a “fourth finger” position.
- Play the notes “C” and “D” by blowing into the recorder and keeping your fingers in the fourth finger position.
Here’s the melody written out with the fingerings indicated:
G (first finger) A (first finger) G (second finger) F (second finger) E (third finger) D (third finger) C (fourth finger) D (fourth finger)
Yankee Doodle
- Start by blowing into the recorder and making a nice, clear sound.
- To play the first two notes, put your index finger on the top hole of the recorder and your thumb on the bottom hole. This is called a “first finger” position.
- Play the notes “D” and “E” by blowing into the recorder and keeping your fingers in the first finger position.
- To play the next two notes, move your index finger down to the second hole from the top, while keeping your thumb on the bottom hole. This is called a “second finger” position.
- Play the notes “F#” and “G” by blowing into the recorder and keeping your fingers in the second finger position.
- To play the next two notes, move your index finger down to the third hole from the top, while keeping your thumb on the bottom hole. This is called a “third finger” position.
- Play the notes “A” and “B” by blowing into the recorder and keeping your fingers in the third finger position.
- To play the final two notes, move your index finger down to the fourth hole from the top, while keeping your thumb on the bottom hole. This is called a “fourth finger” position.
- Play the notes “C” and “D” by blowing into the recorder and keeping your fingers in the fourth finger position.
Here’s the melody written out with the fingerings indicated:
D (first finger) E (first finger) F# (second finger) G (second finger) A (third finger) B (third finger) C (fourth finger) D (fourth finger)
Why do young musicians usually start playing with a recorder?
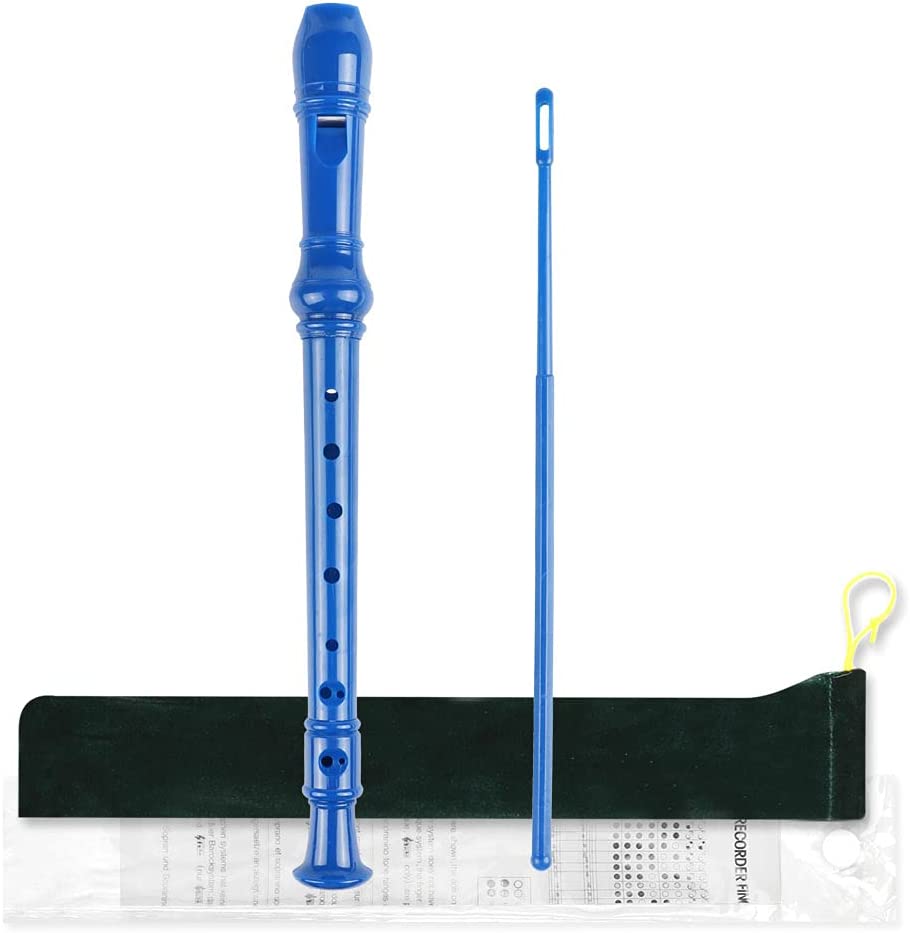
The recorder is often the first instrument that young musicians learn to play because it is relatively inexpensive and easy to learn. The recorder is a simple, wind instrument that is played by blowing into a mouthpiece and covering holes along the body of the instrument to create different pitches. The recorder has a clear and pure sound, making it a popular choice for young musicians who are just starting to learn music.
In addition, the recorder is an ideal instrument for young musicians to learn because it does not require any additional equipment, such as a separate amplifier or pedals. This makes it easy for young musicians to start playing the recorder immediately.
Furthermore, the recorder is small and lightweight, making it easy for young musicians to hold and play. This makes it an ideal instrument for young musicians who may not yet have the strength or coordination to play a larger instrument.
Overall, the recorder is an excellent choice for young musicians who are just starting to learn music, as it is easy to learn and play, inexpensive, and requires no additional equipment.
Here’s a very affordable recorder for beginners, highlighted as Best Choice by Amazon, priced $7.99 at time of writing.