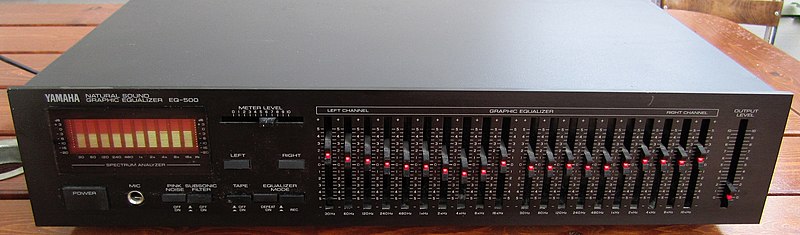
If you’re old enough to have seen home hi-fi systems in the living room, you might have noticed a wide section with vertical faders, usually bearing Hz values at the bottom and dB (or simply a +) at the top of each vertical line. That’s a graphic equalizer.
An equalizer (often abbreviated as “EQ”) is a tool used to adjust the balance between different frequency components within an audio signal.
It allows the user to increase or decrease the level of specific frequency ranges, such as bass, mids, or treble. Equalizers are commonly used in audio processing to tailor the sound to individual preferences, to correct for imbalances in playback systems, or to enhance the sound of a recording.
They can be found in many forms, including hardware devices, software applications, and as a built-in feature in many audio playback systems. The specific design and controls of an equalizer can vary greatly, but the basic principle remains the same: to adjust the relative levels of different frequency components in an audio signal.
Today if you’re using a DAW like GarageBand, FL Studio or Logic, you can enjoy the same experience emulated by a plugin, either presented as simple 3-band equalizer (bass, medium, treble) or as a parametric equalizer.
You also come across plugins offering both compression and EQ features (to pick the frequency you’d like to compress).
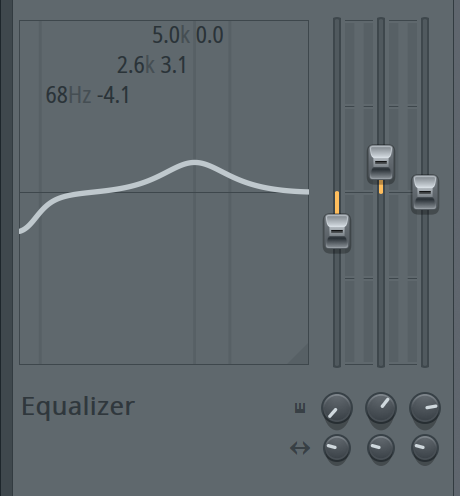
In FL Studio for instance, the 3-parameter default equalizer you get in the mixer view enables you to pick the frequency you want to cut or boost using the faders.
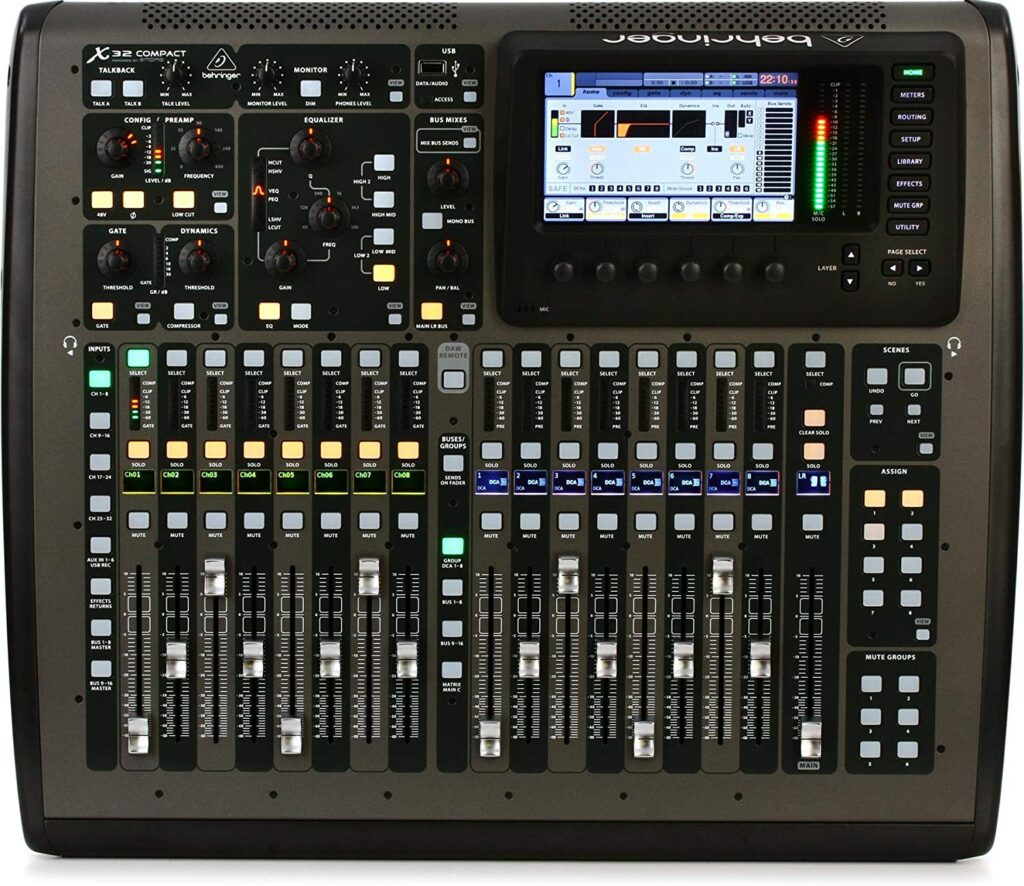
You will also use an equalizer on live and recording mixing desks, both at the master and channel level.
See for instance how you can EQ vocals on a Behringer X32 digital mixing desk.
What are the different types of equalizers?
There are several different types of equalizers, each with its own unique approach to adjusting the frequency balance of an audio signal. Some of the most common types include:
- Graphic Equalizer: This type of equalizer has a series of fixed frequency bands that can be adjusted individually, allowing the user to shape the overall frequency response of the audio. The frequency bands are represented graphically, hence the name “Graphic Equalizer.”
- Parametric Equalizer: This type of equalizer allows the user to adjust the level, frequency, and bandwidth of each filter, giving them more precise control over the frequency response.
- Shelving Equalizer: This type of equalizer allows the user to adjust the overall level of either the high or low frequencies, without affecting the mid-range.
- Multi-Band Dynamic Equalizer: This type of equalizer divides the audio signal into several frequency bands and adjusts their levels dynamically, based on the input level.
- Equalizer Plugins: These are software equalizers that can be added to a digital audio workstation (DAW) or to an audio playback system. They can offer a range of features and control options, from simple graphic equalizers to complex multi-band dynamic equalizers.
Each type of equalizer has its own strengths and weaknesses, and the choice of which type to use depends on the specific requirements of the task at hand.
Graphic EQs are faster to use since you don’t need to pick the frequencies, but they are far less flexible because they boost or cut a wider range of frequencies. If, for instance, you’re mixing a live band and have noticed a nasty frequency which causes a feedback effect, you’d better focus on that specific frequency to fix the problem. Some products, such as the Feedback Destroyer Pro, are now able to identify such a narrow frequency and cut it off.

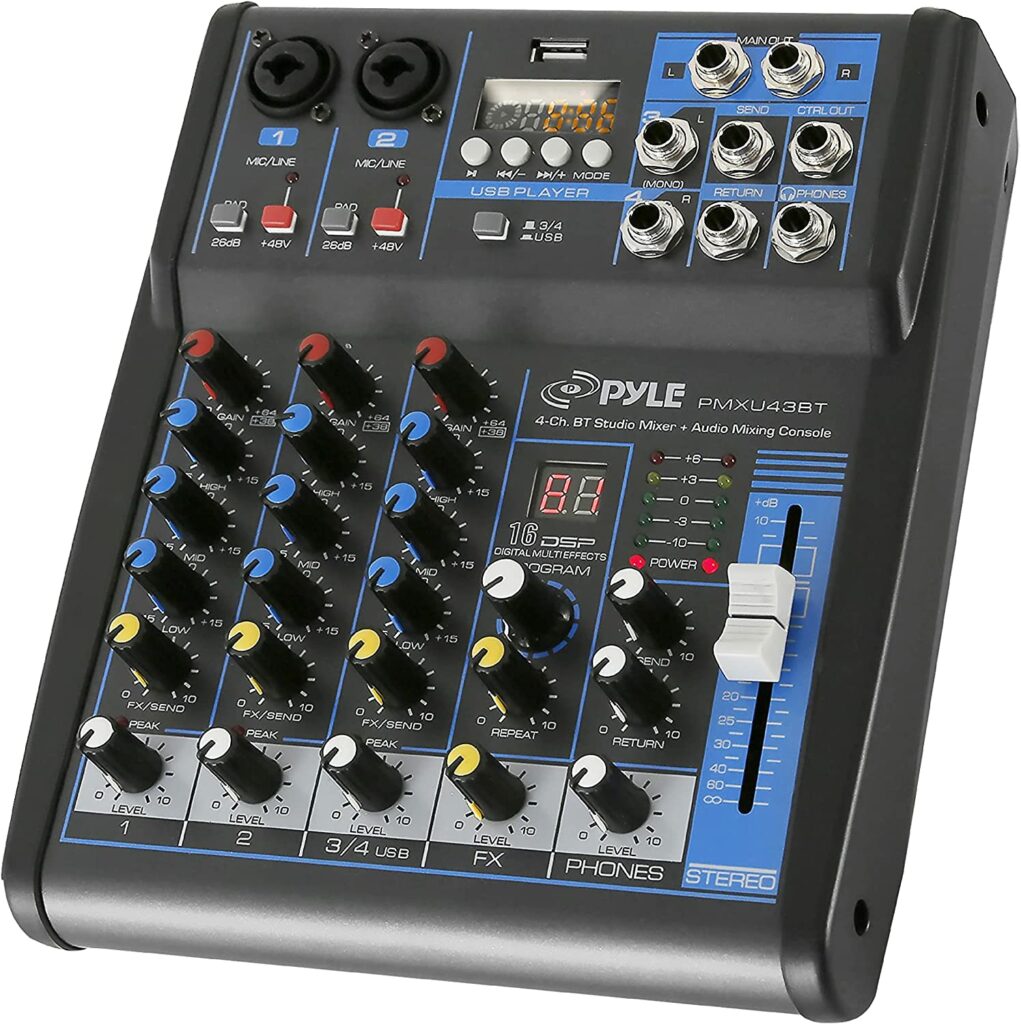
Even on the most basic sound mixers costing less than $100, you will usually get a 3-band EQ for each channel, with knobs instead of faders. See the LOW, MID and HIGH blue knobs on this Pyle USB Mixer.
What’s the best way to use a graphic equalizer?
Here are some general tips:
- Start with a flat setting: Before making any adjustments, it’s a good idea to start with a flat equalizer setting (0 dB boost or cut at all frequency bands). This will give you a reference point for making further adjustments.
- Identify frequency imbalances: Listen to the audio and identify any frequency imbalances, such as a lack of bass or too much treble.
- Make small adjustments: Start by making small adjustments to the frequency bands that need correction. It’s important to avoid making large changes, as this can lead to an unnatural sound.
- Use a reference track: If you’re unsure of how to adjust the equalizer, try using a reference track that you are familiar with and that has a balanced frequency response. This can serve as a guide for adjusting your equalizer.
- Experiment: Don’t be afraid to experiment with different settings to find the best sound for your preferences. The key is to make small, incremental changes and to listen carefully to the results.
- Re-evaluate regularly: As you listen to different types of audio, it’s a good idea to re-evaluate your equalizer settings and make any necessary adjustments.
👉 You should teach yourself to identify bass (low), mid and high frequencies by ear before jumping into tuning the settings of your EQ.
The same general tips apply to other types of equalizers: parametric and multi-band dynamic EQs.
It’s all about starting with a flat reference (all faders at 0 in the center of the EQ) before making any adjustment. That’s how you can adjust the settings of your equalizer for the best sound, depending on the type of audio you’re processing (recorded or live music, pop or classical, etc.)
What’s the basic principle of an EQ band?
The basic principle of an equalizer (EQ) band is to boost or cut a specific frequency range within the audio spectrum. An EQ band typically consists of a filter that isolates a particular frequency range, and a control that allows you to adjust the level of that frequency range relative to the other frequencies.
In practice, this means that you can boost or reduce the level of specific frequency ranges within the audio spectrum to achieve a desired sound. For example, you may want to boost the bass frequencies to make the audio sound more full and punchy, or cut the mid-range frequencies to reduce vocal muddiness.
The key to effective EQ adjustments is to make small, precise changes and to listen carefully to the results.
Don’t go crazy when playing with EQ! Overuse of EQ can result in an unnatural sound, so it’s important to be mindful of the overall balance of the audio spectrum and to use EQ judiciously.
What is the typical audio spectrum perceived by a human ear?
The typical audio spectrum that is perceived by a human ear is generally considered to be in the range of 20 Hz to 20,000 Hz (20 kHz), although this can vary depending on individual hearing abilities and age.
The human ear is most sensitive to frequencies in the range of 2-4 kHz, which is where many important elements of speech and music, such as vocals and lead instruments, are found. The lower frequencies (below around 100 Hz) are perceived as bass, while the higher frequencies (above around 10 kHz) are perceived as treble.
It’s important to note that the perceived audio spectrum can also be influenced by factors such as the listening environment, background noise, and the quality of the audio equipment.
The human ear is also less sensitive to very low and very high frequencies, so equalization adjustments in these ranges should be made with care.
Are there frequencies that you don’t hear but can feel?
There are also frequencies (especially in the low spectrum) which you won’t “hear” but which you will feel. These are called infrasonic or subsonic frequencies and they have a frequency below 20 Hz, which is the lower limit of human hearing.
Infrasonic frequencies can cause physical vibrations in the body, which can be felt as pressure or movement. For example, you may feel the bass frequencies of music as a rumble in your chest or in the floor, even though you can’t hear them.
Infrasonic frequencies are sometimes used in audio systems to create a sense of impact and power, especially in music and movie soundtracks. They can also be used in public address and other sound reinforcement systems to create a more immersive and powerful experience for the audience.
Infrasonic frequencies can be difficult to produce accurately and effectively, as they require large speakers and significant power. However, by using specialized subwoofers and equalization, it is possible to reproduce these frequencies in a way that enhances the overall audio experience.
A great example of the impact of huge bass sound is the iconic Lucasfilm THX Surround Sound Effect which you’ve probably experienced in a movie theatre. It’s called the THX Deep Note. It was screened for the first time at the 1983 premiere of Star Wars: Episode VI – Return of the Jedi.
Another, more recent, iconic movie intro was developed the showcase the power of Dolby Atmos, first presented at the El Capitan Theater in Los Angeles for the premiere of the movie Brave, in June 2012. Today most streaming services are compatible with Dolby Atmos. It’s even used in games (Crackdown 3 and Gears of War 4 are support Atmos on the Xbox One).
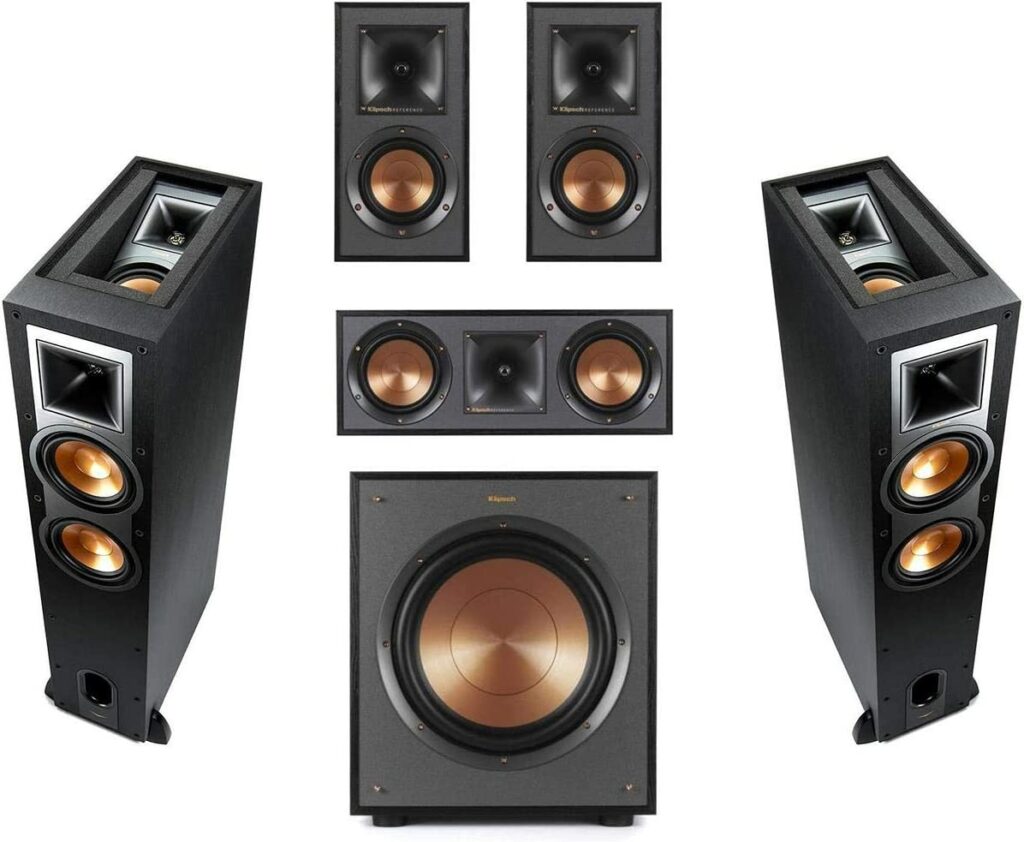
Those cinematic intros are best experienced with a home theatre sound system equipped with a proper subwoofer, such as this premium Klipsch Reference Home Theatre Pack.
How can you adjust the EQ in Spotify?
By default, the EQ in the Spotify app is flat, as you can see on the image below.
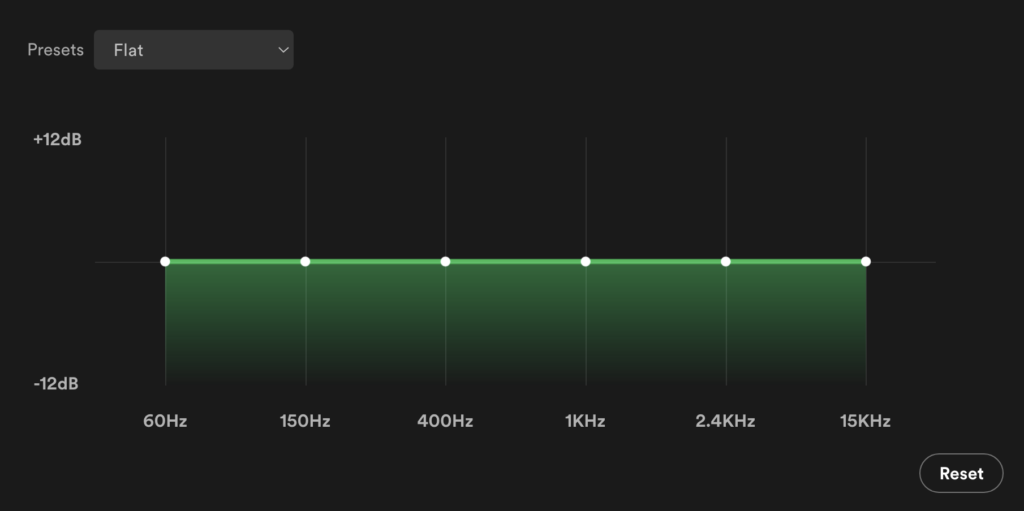
You’ll find the EQ via the SETTINGS of your app (on desktop and on mobile).
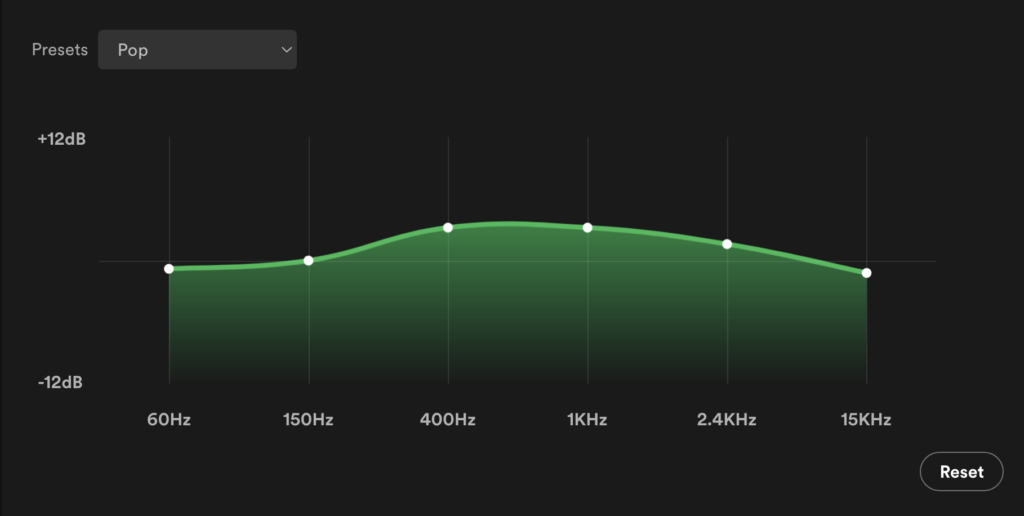
To make things simpler, Spotify offers a series of presets for each broad type of music. See for instance what Spotify suggests for pop music, boosting mid / high frequencies for clearer vocals.
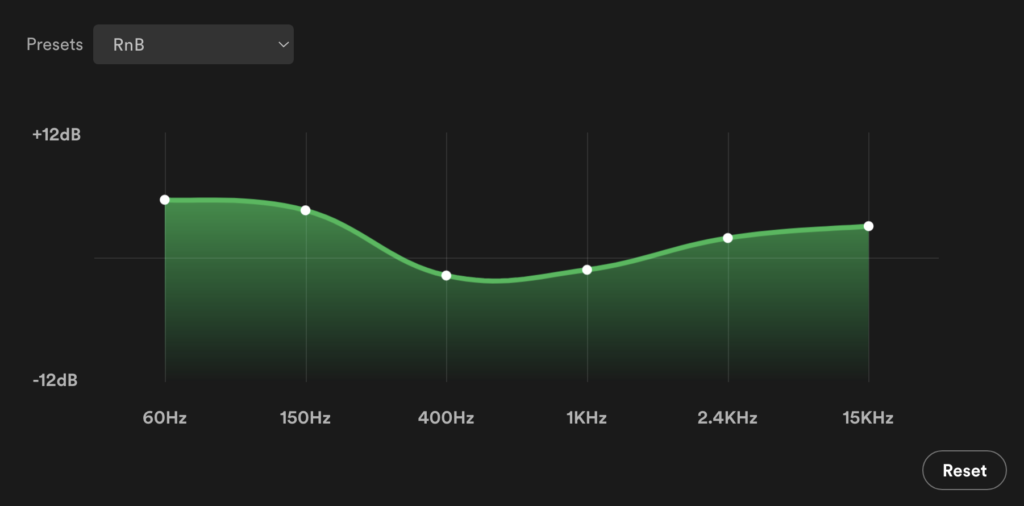
The preset for R&B is radically different, boosting bass to get a warmer pumping sound.
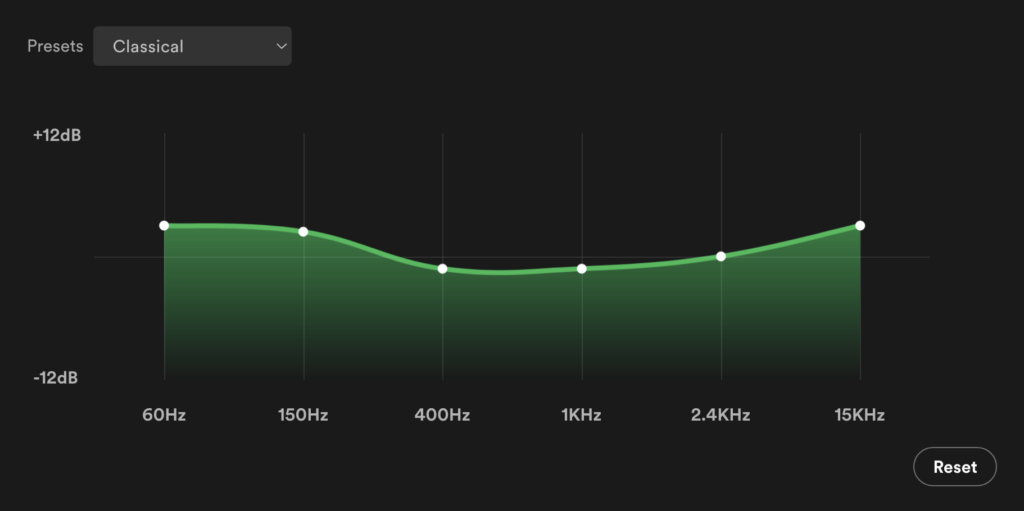
The Classical EQ Preset reduces the mid frequencies for a smoother listening experience.
Playing with the EQ settings on a specific song is a great way to learn about the impact of EQ in sound processing. You will understand how to boost or cut specific frequencies to achieve the expected result. Try for instance a pop preset on a bass-heavy RnB track or a RnB preset on a gentle folk track, to feel how it impacts your listening experience.
What’s the best practice to adjust EQ settings when using headphones?
you should be careful when changing the EQ settings in your headphones. Over-adjusting the EQ can result in an unnatural or even harmful sound, so it’s important to be mindful of the changes you make.
Here are a few tips to keep in mind:
- Avoid boosting too many frequencies: Boosting too many frequencies at once can result in a cluttered and distorted sound. It’s generally best to make small, precise adjustments to a few key frequency ranges.
- Be mindful of the overall balance: The goal of EQ adjustments is to create a balanced and natural-sounding audio spectrum. Be mindful of the overall balance of the frequencies and adjust the EQ in a way that maintains this balance.
- Avoid excessive bass: Overboosting the bass frequencies can result in a boomy and distorted sound that can be harmful to your hearing, especially at high volumes.
- Listen to your audio content: The optimal EQ setting will depend on the specific audio content you’re listening to. For example, bass-heavy music will require different EQ adjustments than dialogue-driven audio like a podcast or audiobook.
- Use a reference track: To help ensure that your EQ adjustments are accurate, you can use a reference track as a guide. Choose a piece of audio that you’re familiar with and use it to help you make adjustments that result in a natural and balanced sound.
Again, as we’ve seen in the general tips above, it’s all about small balanced changes. It’s even more important when using headphones since you can easily damage your hearing if you’re too aggressive in your EQ boosts.
By following these tips and being mindful of the changes you make, you can safely and effectively adjust the EQ settings in your headphones to achieve the best sound possible.
What is the best EQ setting to enhance the quality of vocals?
As for other EQ manipulations, you’ll start with a flat setting at 0 dB for all frequency bands.
Then, you can start experimenting with the EQ settings.
- Boost the presence frequencies: To make the vocals sound more forward and present, you can boost the presence frequencies (typically around 2-5 kHz). This can help to bring the vocals to the forefront of the mix.
- Cut the mud frequencies: If the vocals sound too muddy or indistinct, you can cut the mud frequencies (typically around 150-300 Hz). This can help to improve the clarity and definition of the vocals.
- Adjust the high frequencies: If the vocals sound too harsh or brittle, you can cut the high frequencies (typically above 8 kHz). On the other hand, if the vocals sound too dull, you can boost the high frequencies to add some sparkle and air to the sound.
In FL Studio, how to get the perfect voice?
Besides EQ settings, In FL Studio I love using SoundGoodizer, a smart compressor powered by Maximus, both applied at the master and channel level, to boost the presence and clarity of vocals. This plugin is perfect to deliver a strong impactful voice, for instance when I’m recording radio liners. You can fine tune each of the A, B, C, D presets in Maximus.
I hope that you learned some interesting tips to improve your EQ skills!